July 30, 2012

Fruit Loop Necklace

My Son really loved making this necklace and enjoyed eating it even more!


What You Need:

Stretchy Jewelry Cord
Scissors
Fruit Loops (or candy)
1 Clothespins or Small Chip Clip


Directions:

1.  Cut your string to fit around your childs neck, remember to leave room to tie it.  Attach a clothespin at one end of the cord so that the fruit loops do not fall off, then let your child put all of the fruit loops or candy on. 

2.  After the necklace is mostly filled, go ahead and tie it.  I just took the two ends, put them side by side, wrapped them around my first and middle finger, then carefully eased the loop off of my fingers and stuck the ends through the loop then pulled, nothing fancy.  

July 26, 2012

Salad in a Jar

Making salad in a jar is so simple and can save you a lot of time if you like to take a salad to work or school everyday.  You can make however many salads you need for the week at 1 time then just line them in the fridge to grab and go as needed. 


Salad in a Jar


Ingredients:

Anything you want in your salad
Quart Canning Jars as needed


Directions:

1. Put your dressing on the very bottom of your jar.  Next I put in the cheese to separate the dressing from the lettuce and other ingredients.  Be sure to leave some space at the top of your jar so you can shake your salad up really good.  That's it!

July 25, 2012

Crispy Sweet and Sour Chicken

I haven't blogged in a few days or so but I made this yummy sweet and sour chicken for lunch today so I thought I would share the recipe.  The breading recipe that I use for this chicken is my all time favorite breading recipe, I use it on chicken fried steak and everything.  I love to use the Panko bread crumbs because they give a nice crunchy coating to your food.  Panko can be found at Walmart and most other grocery stores.  I buy mine in the International aisle at Walmart instead of the baking aisle because believe it or not, they have a different brand in each of those aisle but the one in the International aisle is cheaper for the same amount of bread crumbs.  Here is more information on Panko, how it is made and a recipe if you would like to make your own.


Crispy Sweet and Sour Chicken

Yields: 6 servings

Ingredients for Chicken:

2 lbs. Chicken Breast
2 1/2 cups Panko (Japanese Bread Crumbs)
2 1/2 cups All Purpose Flour
2 T Onion Powder
2 T Garlic Powder
2 T Black Pepper
4 T Salt
Vegetable Oil as needed for frying chicken
2 eggs

Ingredients for Sauce:

1 1/2 cups Sugar
8 T Ketchup
2 T Soy Sauce
2 t Garlic Salt
3/4 cup Vinegar (distilled white or apple cider will work)


Directions:

1. First, in a large bowl you want to make your breading mixture by mixing together the flour, panko, salt, pepper, garlic powder and onion powder, set aside.

2. Now you will make your egg wash in a separate large bowl by combining the 2 eggs and 2 cups of water, whisk until it is completely mixed together as a liquid.

3. Cut all of your chicken into small bite size pieces and place them on a plate.

4. Now it is time to bread the chicken.  You will place a handful of pieces into the dry mixture at a time, making sure the pieces are completely coated.  Take the pieces out of the bowl and lightly roll them in your hand with your fingers slightly spread apart to shake off the excess.

5. Place the chicken into the egg mixture briefly but make sure all of the pieces are coated entirely.

6. Place the chicken back into the dry mixture and roll it around, then shaking off the excess just as you did in step 4.  Place the breaded pieces on a clean plate that is set to the side.  Continue this process until all of the chicken is breaded.

7. To make the sauce, place all ingredients for the sauce in a microwaveable bowl or a small cooking pot, stir and then heat until hot.

8. To cook the chicken, place enough cooking oil into your large frying pan so that it will come halfway up the side of your chicken once it is in the pan, you don't want your chicken fully submerged in oil.  Right now is also the time I would put my rice on (Perfect Quick Rice Recipe) and it will be ready just as the chicken is done frying.

9. Once your oil is heated to 375 degrees, start placing pieces into the pan one at a time, do not dump them all in at once.  Let the chicken cook for about 2 minutes on one side or until light, golden brown then turn them over.  I cook my chicken in about 2-3 batches and once a batch is done (golden brown on both sides) I place it on a plate that has paper towels on it to soak up any excess oil.

10. Once all of the chicken is cooked, the rice should be done steaming.  I like to place a scoop of rice into my bowl then top with some chicken and pour on some of the sauce.  I don't like tossing my chicken in the sauce because I usually have leftovers and I like to save the sauce in a separate bowl so I can use it on my chicken after I heat it up instead of mixing all the sauce into the chicken then heating it up and it is dried out.  It is up to you how you want to do it of course.


Perfect Quick Rice

I love the steamed rice I get from my favorite Chinese restaurant and this is how you make it.  It is very simple and takes about 5-10 minutes depending on the amount you want to make.

Perfect Quick Rice


Yields: 4 cups

Ingredients:

2 cups Jasmine Rice
4 cups Water


* When cooking rice, you will always have a ration of 1:2, so for 2 cups of rice you will need 4 cups of water, for 1 cup of rice you will need 2 cups of water etc.


Directions:

1. Combine rice and water into a small/medium size pot.  Stir the rice around a couple of times.

2. Turn the heat onto high and wait for your rice to start to boil.  Once the rice starts to boil give it one last quick stir, place a lid on the top of the pot, turn the heat off and remove the rice from the burner.

3. Your rice will now steam and all of the water will be absorbed.  This takes about 5-10 minutes.  Do not remove the lid until your rice looks like it is nice and plump (doubled in size) and all of the water is absorbed.  After your rice is done fluff it with a fork.  You can add some salt to it if you like or just use soy sauce.

July 20, 2012

Picture Frame Chalkboard

Picture Frame Chalkboard

I use my homemade chalkboard for a dinner menu.
What You Need:


Chalkboard Paint
Large Paint Brush
Large Picture Frame
Plywood Cut To Fit Into Picture Frame
Tape Measure


Steps:


1.  You can either cut your own plywood if you know how, or ask a store associate to cut it for you at a local home improvement store.  Make sure to measure your picture frame so you know what size to cut the plywood so it fits inside your picture frame.


2.  Paint your plywood with the chalkboard paint, I used about 4 coats for mine, letting each coat of paint dry before applying another.


3.  After 4 coats of chalkboard paint and the plywood is dry, put the plywood inside the picture frame, you now have a chalkboard dinner menu!


*Tip: You can also paint your plywood with magnetic paint before you paint it with chalboard paint so it can be used to hang magnets on, also.  I purchased my picture frame at the Salvation Army when they had a 50% off sale, I removed the old painting that I didn't want, the frame ended up being just $10.

July 19, 2012

DIY Postcard


DIY Postcard


Materials needed:

1 Piece of Printer Paper
1 Postcard Stamper
1 Large Ink Pad
1 Piece of Recycled Cardboard (the size of a postcard)
Double-Sided Tape
Scissors


Directions:


1.  Use your postcard stamper to stamp onto the piece of printer paper.  Cut out the stamped part of the paper (estimate) to the size of a postcard.  Write your message onto the postcard once the ink has dried (about 3 minutes).


2.  Flip the piece of printer paper over to the blank/backside.  Use the double sided tape to cover the entire back of the paper.


3.  Attach the taped portion of the printer paper to the brown/blank side of the cardboard.  Press down firmly to make sure the printer paper is nice and secure to the cardboard and smooth out any air pockets.  I used some cardboard from a soda box for my postcard because I didn't have any plain cardboard but I actually like it better this way.


4.  Use your scissors to cut the excess cardboard off of the postcard.


This is the postcard I made, yours will most likely look nicer since I ran out of ink and made my own using a combination of rubbing alcohol and gel food coloring and it was a little too wet/messy, but I don't think it turned out too bad with the homemade ink.

July 18, 2012

Fizzy Bath Bombs

Fizzy Bath Bombs


What you need:                    Yields: about 7 or 8

1 cup Citric Acid
2 cups Baking Soda
4 tsp. Fragrance Oil (or more or less, it is to your own preference)
Spray Bottle filled with Water
Molds (you can use the bottom portion of an Easter egg)


Steps:

1.  Mix the baking soda and citric acid together in a bowl, you can use a mixer but I just mixed it really well by hand.

2.  Add the fragrance oil to the mixture and mix well again, just add small amounts gradually until you get the scent to your own personal preference.

3.  Make sure your spray bottle is set to a "fine mist" because you don't want to get the bath bomb mixture too wet.  If it gets too wet it will start to fizz and expand which is not what you want.  Apply a couple of sprays at a time to the mixture and mix again.  You want the mixture just damp enough to hold together when you squeeze it in your hand, spray and mix until you get the right consistency.

4.  Now you can fill your molds with the mixture.  I used the bottom, round part of some Easter eggs that I have.  I didn't attach two bottoms together, I just stuffed one full of the mixture then wrapped it tightly with plastic wrap.  You can also use any other type of mold you choose such as a round bath bomb mold or silicone mold of a fun shape.   


*You can find fragrance oils, molds and the other ingredients for this project Here or Here.


July 16, 2012

3-D Flag Picture

I made this little, patriotic picture to put into our guest bedroom.  The flag pops out from the words in the background and it looks really nice after you put it all together.  This project took about 5 minutes to do and was so easy!  I found the free printable and instructions for this project HERE.  Be sure to print both pictures 5x10, they will come out right.  Also, I used Kodak glossy photo paper to make mine (be sure to set your printer setting to the glossy photo paper for best results).  All you need is a printer, printer paper (preferably glossy photo paper), a hot glue gun and a glue stick for it and a 5x10 frame (I bought mine at Walmart for about $2).  For the back of the flag, I just used a piece of leftover scrap paper from the cut outs, rolled it up into a thick square and put a dab of hot glue on it to hold it together.  I also hot glued the finished square to the back of the flag and the background words instead of using a glue stick, double-sided tape would probably work too. 


Here is the one I made


July 12, 2012

Fishing In The Mesa National Park

Our fishing trip to "The Mesa" on Thursday (7-5-12) was very successful and alot of fun!  We (Husband, Son, Mother Father, Brother and Myself) were there for about 4 hours and between all of us we caught and kept 14 trout for dinner and to freeze for later.  My Husband ended up smoking the trout and it turned out so delicious!


Davin collecting flowers for his Grandma.


Cute bumblebee.


One of the 3 fish Davin caught.


Davin sitting at the lake.

Grizzly Creek - Glenwood Canyon, CO

On Sunday (7-8-12), we were driving through the canyons.  We decided to stop at Grizzly Creek to take a break and stretch our legs.  Davin loved tossing rocks into the creek and watching the water rush by.  Grizzly Creek is a very popular place for people who want to go rafting.


July 10, 2012

Gold Panning In Colorado

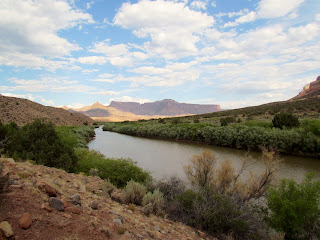
This evening (Monday, 7-9-12) we took a trip back in the mountains to pan for gold.  We didn't get to stay long because we went later in the day (and it was 100 degrees with no shade!) but it was still pretty fun.  Last year we first got into gold panning and haven't gotten to go at all this year until today because we have been pretty busy with moving and everything else (army life).   We didn't find very much gold (1 flake) but we will most likely go back in the fall when it has cooled down alot and the temperature is much more tolerable.  Maybe we can find a nice amount later, hopefully!  If not that's okay too, it's just great to get out into nature and panning really is alot of fun.


The river we panned at.


Juniper Berries


Lots of cactus everywhere.


The spot on the river that we panned at.


Our bucket of river rocks and dirt to pan.


Sifting through the dirt, gold is very heavy so it sinks to the bottom under everything else.


Our sluice box to run large amounts of dirt through instead of panning it by hand.  The gold gets trapped inside on the mat.  You take the sluice box apart and get the gold off of the mat.


My Husband running material through the sluice box.


Our little gold panner.

Gateway, Colorado

On Monday (7-9-12) we went gold panning, these are some of the pictures I took along the way up to Gateway, Colorado.

He said "Mom, the wormies are all over me!"


Jack Rabbit


Coyote


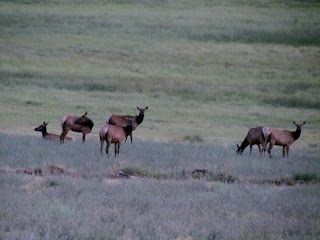
Elk

July 9, 2012

Laundry Stain Remover

To use this, I take a Tablespoon of the mixture, apply it to the stain and let it sit for about 20 minutes.  You can also soak the whole article of clothing in this solution, you just need a small tub or container to put the item in.  Be sure to stir the mix before each use because it will separate.


Stain Remover
  1. Yields:  1 small container

Ingredients

½ cup Hydrogen Peroxide
½ cup Baking Soda
1 cup Water

 Steps

1.  Mix all ingredients together a store in a small container or old oxy clean container.  Apply to stain and let sit for 20 minutes, then clean spot or wash item of clothing.


July 8, 2012

DIY Liquid Hand Soap


I made this and it made 1 gallon of liquid hand soap using only 1 bar of soap!  I used the Soft Soap brand to make mine, it turned out really nice.


Liquid Hand Soap

Yields:  1 Gallon

Ingredients

2 Tablespoons of Liquid Glycerin (found it at a Hobby store, about $3 a bottle) 
1 - 8 oz. Bar of Soap, Grated
1 gallon of Distilled Water

Steps

1.  Fill a large pot with the gallon of water and soap shavings, let the soap dissolve, save the empty gallon jug.

2.  Add 2 Tablespoons of liquid glycerin and turn the heat to medium/high and stir until the soap dissolves.

3.  Let the soap cool for 10-12 hours, then mix with a stick blender then funnel into the empty gallon jug.

July 5, 2012

Bath Time Squirt Gun Paint

My Son loves this so much!  You buy a pack of little, cheap squirt guns, I paid $1 for the 3 pack that my Son has.  I filled each little bottle up and put in 1 to 2 drops of food coloring in each.  I recommend this activity for kids 3 and over since smaller kids probably won't spray them just in the bath tub.  I put my Son, Davin, at one end of the tub and he would shoot the bath tub wall at the other end with all 3 different colors.  This is a great way to get your kids into the bath tub easily because they will want to go have a blast painting the shower wall.  Afterwards, just spray all of the color off and you're done, easy as that :)!  I also recommend having a shower head that is detachable so you can maneuver it around to spray off all the shower walls because it will most likely get on the inside wall too.


Dishwasher Detergent

I have been using this recipe for about a month and it has been working great.  My dishes come out clean and sparkly.  I recommend the “tough scrub” option on your dishwasher or "extra rinse" for the best results and you can use distilled white vinegar as your rinse agent.  Don’t worry, you won’t get any weird, vinegar smell on your dishes either!
Dishwasher Detergent
                                                                                                Yields: About 60 Loads
Ingredients
2 cups of Borax


2 cups of Baking Soda


4 tablespoons of Citric Acid (can also use lemon kool-aid, not sure if it stains but I heard it doesn't)


Distilled White Vinegar (rinse agent)


Steps
1.  Pour everything except the vinegar together into your blender, you may need to do half a batch at a time due to space, depends on how big your blender is.  I like to blend up the mixture to get any clumps out, if you want to just put it all in a ziplock bag and shake it up you can try that too.  Store your detergent in a ziplock container or bag.  Use 1-2 T per load, the white vinegar is used as the rinse agent.

July 4, 2012

Soft Pretzels

I found a great recipe for soft pretzels on Pinterest and decided to give it a shot the other day.  Oh my goodness are these pretzels delicious!  The recipe makes about 9 pretzels, maybe 10.  I didn't want to bake all 9 pretzels at one time because they taste best when you eat them immediately.  I ended up freezing the remaining 6 on some parchment paper on a baking pan.  I followed the recipe all the way to where you dip the pretzels into the baking soda water to rise some more, let them rise, then placed the ones I didn't want to bake until later, into the freezer.  When I went to bake the frozen pretzels I turned the oven onto 250 degrees.  When the oven heated to 250 degrees, I turned it off and placed a loaf pan on the bottom of the inside of the oven that was halfway full of water, then popped the tray of pretzels in to heat up.  This method creates a homemade proof box that you can also use to raise any bread with yeast before you bake it, instead of turning on the oven and setting the loaf pan on top to rise this is very quick and works great.  Here is the link to the recipe I used, there are great pictures to follow step by step.


These are the pretzels I made, they came out very soft and SO yummy!


July 3, 2012

Colorado National Monument- Fruita, CO

This evening we took a ride through the Colorado National Monument. The road through the Monument is about 23 miles long and there are beautiful views throughout the entire trip. These are some of the photos I took along the way.

A view from the beginning of the road that led us through the Monument


A tunnel made out of the mountain


This is Independence Monument (the free-standing rock formation in the center).


A closer view of Independence Monument


The Coke Ovens


A vulture


This little guy was hanging out on the ledge of an overlook


Every year on the 4th of July, a small group of people climb to the top of Independence Monument and raise an American flag.  You can see a picture and get more information on the flag raising here.


A look over the edge, the small brown line in the center is a trail.